Saturday, December 13, 2014

Christmas Album

Merry Christmas everyone!!!
This is my last DT project for Imagine if...this year and it is another blog hop with a twist.
Every blog you hop to be sure to take note of the "clue" but don't write it anywhere.  Simply click this link HERE to be taken to the FB page and post "I WANT IT ALL"
This will put you into win an awesome Christmas prize then if you win you write all of the clues and there you go.
So the clue for from me is - 4 SANTA HATS

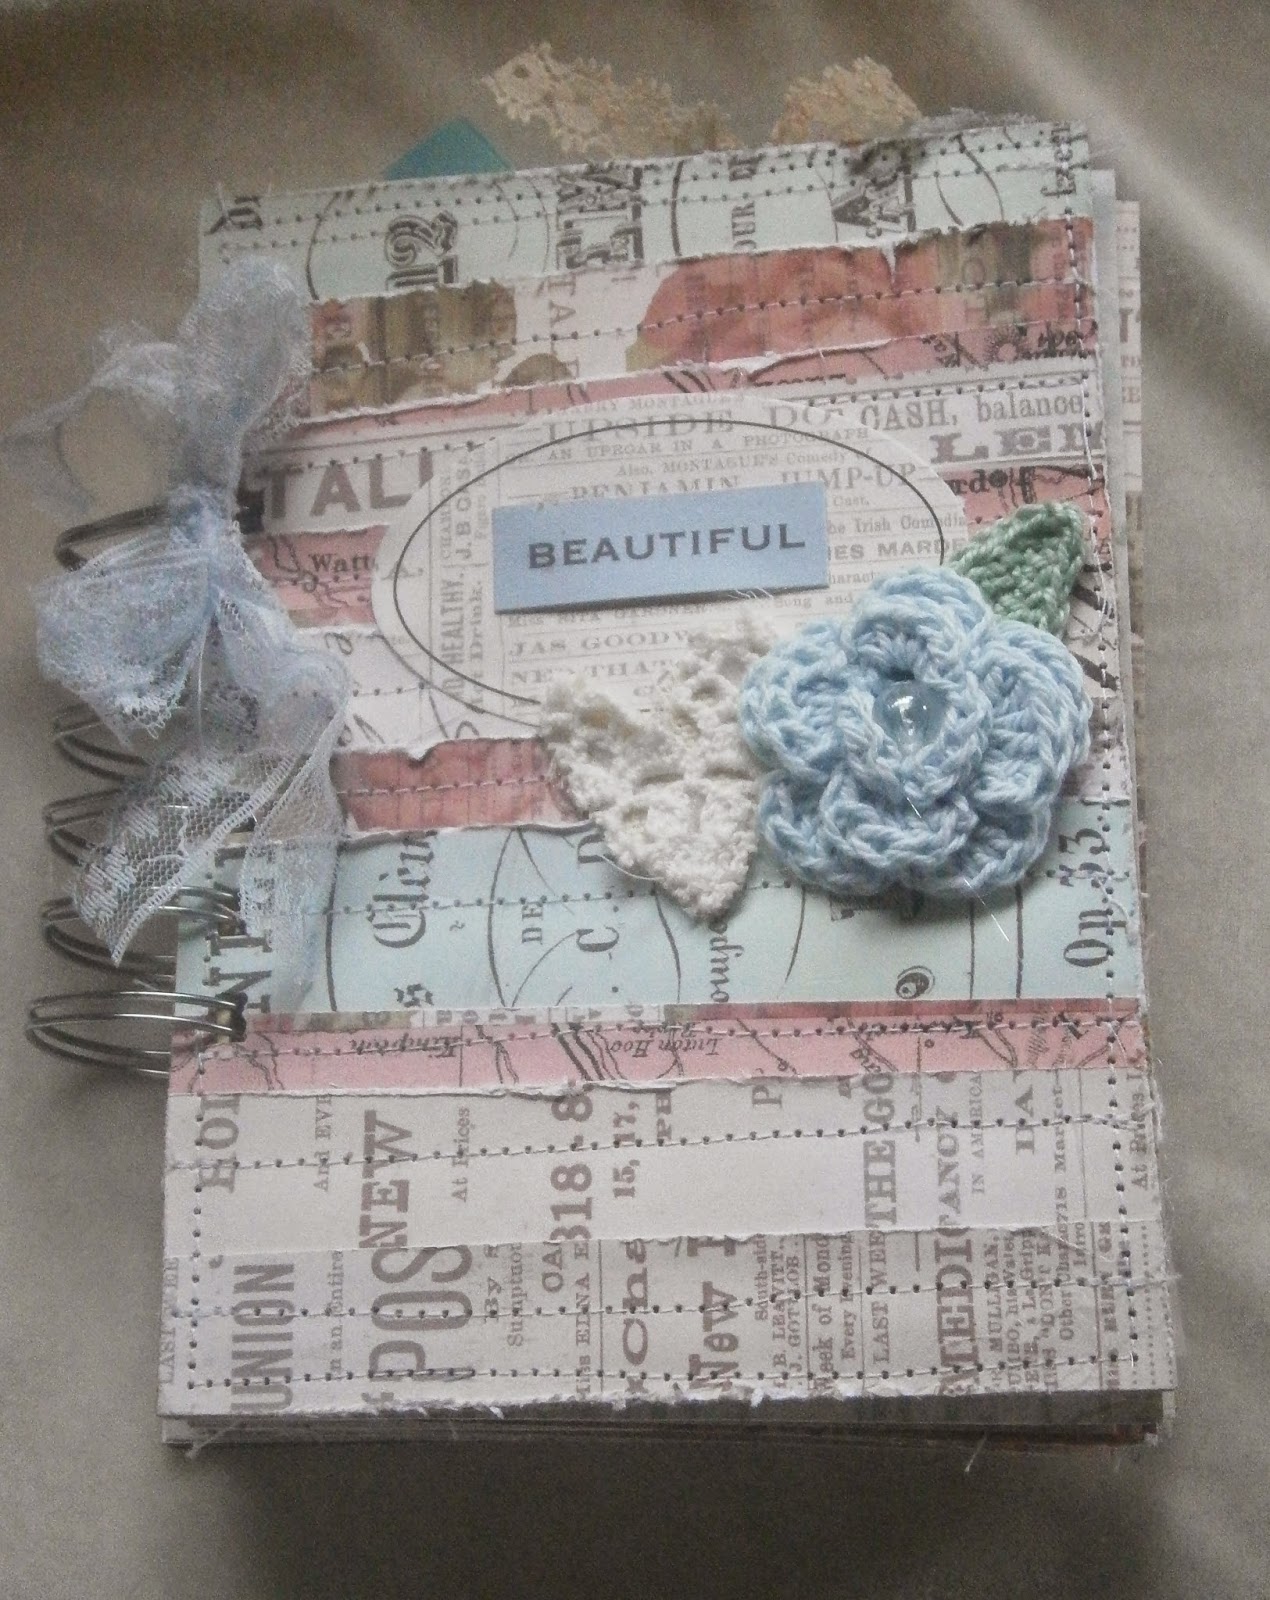
And now for my creation :)


Black gold and white are my favorite colors and I am so happy they are trending right now
This chip board book actually comes in and A4 size but I had a bit of a "situation" so has to cut it down...but hey thats crafting you just learn as you go along and as it turns out I like the new look of my book.

On the spine I have tied some lace and also added some chain.  I painted a few of the cute wee chipboead pieces I then added an eyelet so I can then hang them on the dangle :)


This page has a photo mat that opens up for more room for pictures and journaling.


 These pages below have nice large photo mats to put those special pics that re capture a great Christmas occasion.


 I made the photo mats with tags tucked behind...another place to journal or even more pics.


and a pocket page with more mats and journal spaces.
You can see through out the book I have painted all my little chip board embellishments in gold.  All these chipboard pieces are available from Imagine if....


Have fun hopping...and Merry Christmas :)

Saturday, December 6, 2014

Christmas Stocking

Merry Christmas Everybody!!!
Hope everyone is getting into there Christmas decorating and shopping and hopefully managing some Christmas crafts amongst all the business this time of the year brings.

This week For Imagine if...I have embellished this cute burlap stocking.  If you follow the hop you will see all the stockings everyone on the team have been doing.
There was a guessing game going on this week who would design what type of stocking and it seems my fellow team members had me pegged and true to form it seems I didn't disappoint.
So here's mine with...you guessed it lace and doilies :)


So there you have it guys.  I couldn't guess what the other ladies would do they are all so different and I'm sure will inspire you in their own way.

Be sure to check them all out.
Click HERE to go to the next blog
Click HERE to go to the previous blog.

Merry Christmas crafty friends

Saturday, November 29, 2014

Christmas Tree Album

Hey there Crafters
Hope everyone's getting inspired by all the christmas crafts the team here at Imagine if have been doing.
This week I want to share with you something a little fun and colorful.  Instead of making the MDF Laser cut tree as a decoration I decided to use the shape as covers for a mini album.
Click here to check out this tree


You can see below that I have embellished the cover with gold trim and images cut from the paper that I have popped up to add dimension


Here are a few of the inside pages.


This was a fun album to create and will be great to fill with photos of Christmas day.

Don't for get to follow along on the blog hop by clicking
HERE for the previous blog
and HERE for the following blog

MERRY CHRISTMAS EVERYONE AND HAPPY CRAFTING


Saturday, November 22, 2014

Christmas Tag and small gift tags

Hey there crafty friends
I wanted to share with you some tags I created using supplies from Imagine if.....


The big Tag I did is not traditional Christmas colors but I thought "hey!! It's my tag" so I went ahead.

This is a pretty large tag I cut from heavy cardstock I then layered and stitched some canvas type fabric and then some vintage music paper.


I colored up these cute flower shape chipboard pieces with gesso first and then black and orange stickles layered them on top of one another and popped a little black bling in the center.


Here you canse that I have covered the chipboard Christmas tree with some music paper and then added some bling to it and the gorgeous frame underneath I covered with stickles.

I also created some little gift tags and they are so cute with the little chipboard pieces on them


Below you can see I cut some tiny tags,  layered them with some scrap canvas, music paper and some burlab and tied some twine up the top.
I painted the little gingerbreadman, stocking and candystick with arcrylic paint and then went over them with stickles.

Hope you are all getting in to some christmas crafting and having fun.

Don't forget to check out the previous blog
click HERE
and also follow on to the next blog
click HERE


Monday, November 17, 2014

Journal - Beautiful

Hey guys
I've been on a bit of a crafty roll lately so I have a few things to share.
First up is this Journal I did today and I really like how it turned out.


For this journal I tea dyed paper, did alot of stitching...made tags and pockets.  I added ledger paper and other papers.  This journals was heaps of fun to make.


The paper I used in this Journal was from and older collection from Pink Paisley.  I love it.
Dived into my box of die cuts and ephemera.
I also cut banner shapes out of the scraps to embellish certain pages.


Thanks for stopping by.  
Get your crafton !!!!!!


Saturday, November 8, 2014

Christmas Sleigh

Back again with another Christmas project using supplies from Imagine if...

This Christmas Sleigh comes as raw MDF in 4 pieces that you very easily assemble yourself..once that is don the fun begins.


Once assembled I took bits and pieces of chipboard die cuts from Imagine if... and glued them on to the sleigh to create some interest and dimension.
I then painted the whole thing with 2 coats of gesso.


Using acrylic paint in antique gold and antique cream I painted it. Trying to achieve an old rustic look.
I then put glue on all the top areas and sprinkled loads of diamond dust to create and snowy look.


Be sure to check out the other blogs on this hop and be inspired by all the other Christmas creations.

Click HERE for next blog
click HERE for previous blog

Happy crafting :)

Saturday, November 1, 2014

Christmas Layout

Hey there
Well the festive season is nearly upon us...so it's time to get onto some of those Christmas crafts.
This week I have used some supplies from Imagine if... to create this layout.

This close up pic below show you how I distressed the edges of the designer paper and then layered them.  The papers I used were from Kaisercraft - Basecoat Christmas Collection.
I inked up these cute little ginger bread men added a twine bow and some stickles for buttons


The image I used on this layout was a cutout from a 12 x 12 page from Paper Arts.  I colored up a couple of chipboard holly leaves and added some flat back pearls.

Be sure to click the links below to be a part of the blog hop.
Get inspired to do some Christmas Crafts.

Click HERE to go to Brenda's blog
Click HERE to go to Ngaere's blog

HAPPY CRAFTING!!!!!


Sunday, October 26, 2014

Easel Card

Hey crafters
Wanted to share with you this easel card I made using supplies from Imagine if...


I also used some beautiful pattern paper from Paper arts. A chip board frame,  sentiment,and butterfly that I lightly gessoed for a shabby look and also used some stickles.


This crafty project is part of an Imagine if  blog hop so don't forget to check out the blogs of my fellow designers.  Get inspired and get crafty :)

Click HERE to go to previous blog
Click HERE to go to next blog


Sunday, October 19, 2014

Oh Boy!!! - Mini Album


Hey guys 
Just a super quick post to show you a Mini Album I created for a Little adventurous boy.


This was so fun to make with all the colors.
Heaps of pockets with tags and photo mats.


Be sure to click these links and follow my creative journey all over the place :)

https://www.facebook.com/WithAllMyArtSoul
http://www.youtube.com/user/artsongandsoul
https://plus.google.com/u/0/

Cute Notebooks - Easy Peasy


Hello

I wanted to share with you these cute little notebooks I have been making.
These ones I have done with a fairy shabby chic vibe going on but I have also been doing them in other style aswell.


To make these books all I have done is gather my papers together.  I have tea dyed some paper and also used some designer papers.  I have then cut them to size.  For these ones I cut them at 21cm x 10.5cm and then I folded them in half and sewn straight up the middle.  How easy is that!!!

Obviously if you don't want to wreck you sewing machiene you want to keep the. to about 7 or 8 pieces of paper but once folded it gives you enough leaves to make a cute little notebook.


I also added tucks and pockets in which you can slide in tags and Journaling spaces aswell as a few photo mats.  I have made up heaps to sell at markets but these would make gorgeous little gifts and stocking fillers.   Brag books...Gratitude journals...thank you gifts...a great little project to make and to use up some of your gorgeous paper scraps.


Thanks guys :)